Recharging the refrigerant on a window AC isn't something done frequently, because most times a person will purchase a new unit as soon as an old device fails.
Windows air conditioners can nevertheless be recharged with refrigerant and be put back to work cooling a space or room.
Learning how to do this safely will save you a ton of money.
Recharging a unit isn't tricky, but if you haven't worked with HVAC refrigerant, make sure you learn about it before you start.
There are two ways of recharging a window a/c: the low-cost backyard quick method employed by many homeowners, or the technology method that's more involved but recommended.
The low-cost backyard technique is the most-used method to recharge a window A/C device if it's low on refrigerant, although not suggested.
Below are the steps for both kinds of recharging methods.
Parts needed:
Backyard Quick Method To Recharge A Window A/C

Attaching a Bullet Valve
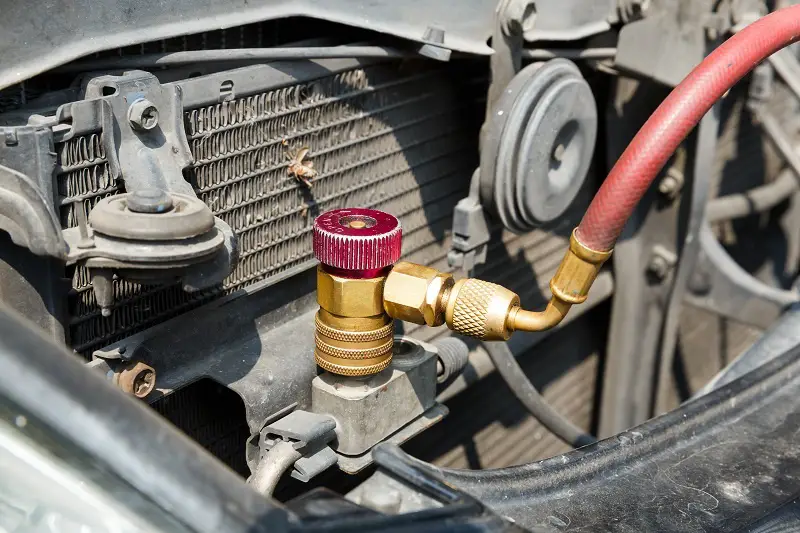
A bullet valve is a fast and simple way to add a recharging port into an A/C unit.
Window AC units do not generally have a service port that can easily take a low-cost bullet valve.
A bullet valve is easy to connect using an Allen Valve Fridge wrench to secure the screws onto it. It includes a sharp valve that goes into the line and is usually connected to the low-pressure refrigerant line.
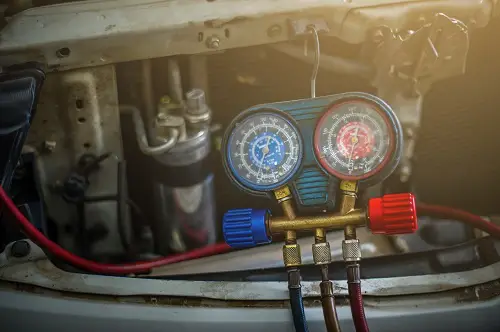
A HVAC gauges or recharge hose will also be required.
Refrigerant Type
The sort of refrigerant the machine uses will be labeled on the device.
Many old units use R22 that's not manufactured anymore, and newer units are usually utilizing R410a.
There are many internet forums and videos of people utilizing R134a refrigerant to recharge window air conditioning units.
But when recharging refrigerant, they should not be mixed since no machine is designed for mixed-medium refrigerant.
Also, the oils used in HVAC systems may vary and ruined the compressor or other pieces.
Lots of YouTube videos claim to have great success using R134a refrigerant in R410a and R22 systems - but we wouldn't recommend doing that. Use what the manufacturer recommends, and nothing else.
People use R134a because it's widely utilized in automobile air conditioning systems with low-cost cans sold on the internet and auto parts stores.
Refrigerant Pressure
Every HVAC system will require different pressures depending upon the temperature.
This means every window A/C unit will require the right pressure to cool.
If a device is low on refrigerant, the pressure will be too low and the machine won't work.
If a device is overfilled, the pressure will be too high and the machine won't work either.
For this reason, it's crucial to get the pressure right when adding refrigerant as not to overfill the unit.
It is recommended to not go above 35-40 PSI on the low-pressure line before testing the device and seeing if it begins to cool.
Beginning at a lower pressure such as 30 PSI is greatest and testing the unit for cooling.
If the unit isn't cooling, slowly raise the pressure until it starts cooling.
A recharge hose or HVAC gauges with a pressure age will be necessary.
How To Recharge a Window A/C (Recommended Method)

1. Find and Repair Any Leaks
The very first step should be to check for leaks. If a window unit has a very slow leak, it will only require a small boost every year or so. Very common and no problem if you want to run your AC like that.
A fast leak will have to be repaired and fixed before refilling it.
There are a few ways to find a leak, from a visual inspection to filling a system with Nitrogen and using soap to find the leak.
Leak detectors can also be purchased. These sniff for refrigerant leakage and make a quick, clear beep when it is detected.
It's common for leaks to occur at joints. If you find a leaky joint, it frequently requires soldering them together again to repair.
2. Install a Service Port (Schrader Valve)
Small air conditioner units won't typically have a service port to hook gauges to.
Installing a service port is a simple job and requires soldering at a port or using a piercing valve kit.
A piercing valve is simple to install and the most frequent technique to install a Schrader Valve on a device.
Service Vents are often installed on the low-pressure line to add refrigerant. That's the larger diameter line.
3. Recharge the Unit
After leaks are repaired and a service port has been installed, it is time for the refrigerant.
An HVAC gauge and the right refrigerant is needed.
Most units use R410a today, but make sure to read the device's service label.
R410a can be purchased at air conditioning supply stores or online.
Hook your gauges to the service interface and to the refrigerant tank.
Make sure to understand what the full-charge PSI setting is before beginning. Don't overfill the unit.
Also, make sure to eyeball your pressure on the gauges and a temperature-pressure chart to understand what it ought to be.
Summary

The above are the basic measures involved in recharging a window a/c unit.
Keep in mind, there'll always be unique differences between manufacturers.
Also, make sure to follow safety procedures as you would with any HVAC unit.


